jmanteau
Mon coin de toile - A piece of Web
Custom Linux Image for Eve-NG Unetlab or PNETLab
Creating an image on a system with full internet access for use on an isolated network labbing hypervisor involves several steps.
This guide will take you through the process, focusing on macOS as host for image creation.
Utilizing QEMU for Image Creation
QEMU, a powerful virtualization tool, enables the creation and management of virtual machines. For macOS users, QEMU 7.1 or newer integrates with Apple’s VMNET framework, offering enhanced networking capabilities without needing root access. socket_vmnet is a recommended tool for those who prefer not to run QEMU as the root user, providing a seamless experience without the com.apple.vm.networking entitlement.
For hardware virtualization support, leveraging the MacOS Hypervisor Framework with QEMU allows native support, ensuring efficient virtual machine operation. This feature requires QEMU 7.0 or later and macOS 12 or newer.
Installing QEMU and socket_vmnet is straightforward with Homebrew:
brew install socket_vmnet qemu
Create a qcow with qemu-img
Start by creating a QCOW2 disk image, a flexible format that supports features like snapshots:
qemu-img create -f qcow2 hda.qcow2 30G
Launch the system installation with Qemu
The system used for lab are generally on X86 so we will crete a x86_64 image with qemu-system-x86_64
By default qemu-system-x86_64 does emulation, not virtualization. You can use qemu-system-x86_64 -accel hvf to enable support for hardware virtualization with MacOS hypervisor framework on X86 (or -enable-kvm on a Linux host)
On Mac Intel:
qemu-system-x86_64 -accel hvf -m 1024 -smp 2 -cpu host \
-cdrom debian-12.5.0-amd64-netinst.iso -boot d \
-hda hda.qcow2 -k fr-fr \
-vga virtio -display cocoa,show-cursor=on -monitor stdio
-device e1000,netdev=user0 \
-netdev user,id=user0
On Mac ARM:
qemu-system-x86_64 -m 1024 -smp 2 \
-cdrom debian-12.5.0-amd64-netinst.iso -boot d \
-hda hda.qcow2 -k fr-fr \
-vga virtio -display cocoa,show-cursor=on -monitor stdio \
-device e1000,netdev=user0 \
-netdev user,id=user0
Start the new installed virtual machine and configure it
The first step is to install xinetd and telnetd on your system. xinetd stands for the Extended Internet Daemon, a daemon that listens for incoming requests over a network and launches the appropriate service for those requests. telnetd is the server for the Telnet protocol.
After installing the necessary packages, you need to configure the Telnet service. This is done by creating or modifying a configuration file under /etc/xinetd.d/ directory, which is where xinetd looks for service configuration files.
The last steps involve enabling and starting a serial console service, which allows you to access the server console over a serial connection such as the way the Virtualization Platform will try to connect to the VM.
Here are the steps to do so :
apt install xinetd telnetd

sudo cat <<'EOF' > /etc/xinetd.d/telnet
service telnet
{
disable = no
flags = REUSE
socket_type = stream
wait = no
user = root
server = /usr/sbin/in.telnetd
log_on_failure += USERID
}
EOF

sudo service xinetd restart

systemctl enable serial-getty@ttyS0.service

systemctl start serial-getty@ttyS0.service
Add the required software
Adapt this section based on your need (GoBGP, FastNetMon, FRR, etc)
apt install hping3 nmap
Stop the virtual machine
Type quit in the QEMU prompt : (qemu) quit
Compress the Qcow disk image and transfer it
At the end, compress the image to gain some space.
- Option #1: Shrink your disk without compression (better performance, larger disk size):
qemu-img convert -O qcow2 image.qcow2 export.qcow2
- Option #2: Shrink your disk with compression (smaller disk size, takes longer to shrink, performance impact on slower systems):
qemu-img convert -O qcow2 -c image.qcow2 export.qcow2
(PNETLAB) Create a custom template file and a new config file
For integration with platforms like PNETLAB, create a custom template and configuration file for the new device type. This involves specifying the machine’s properties, such as CPU, RAM, and Ethernet interfaces, and placing the QCOW2 image in the designated directory.
$ cd /opt/unetlab/html/templates/intel/
$ cat fastnetmon.yml
---
type: qemu
description: FastNetMon on Debian 12. root/retour123
name: fastnetmon
cpulimit: 2
icon: Server.png
cpu: 2
ram: 1024
ethernet: 1
console: telnet
shutdown: 1
qemu_arch: x86_64
qemu_version: 2.12.0
qemu_nic: virtio-net-pci
qemu_options: -machine type=pc,accel=kvm -serial mon:stdio -boot order=c
...
$ cd /opt/unetlab/addons/qemu/
$ mkdir fastnetmon-1.2
$ mv {QCOW2_PATH} hda.qcow2
$ /opt/unetlab/wrappers/unl_wrapper -a fixpermissions
Commit Image Docker and Qemu
DOCUMENTATION EXTRACTED FROM https://pnetlab.com/pages/documentation?slug=commit-image-docker-and-qemu
From version 2.0.7, PNETLab allow you to Commit the current state of a Qemu or Docker Node to the original image.
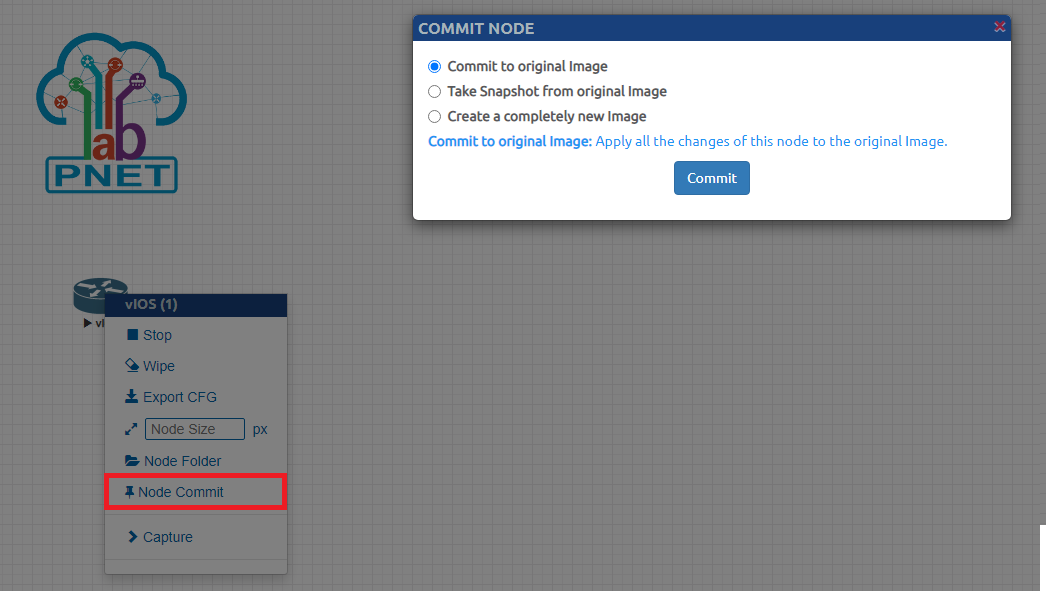
- You have 3 option when commit a Node
- Commit to original Image: Apply all the changes of this node to the original Image
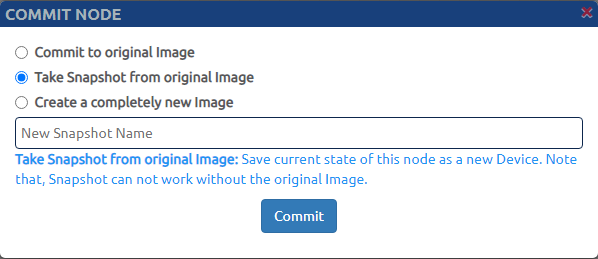
- Take Snapshot from original Image: Save current state of this node as a new Device. Note that, Snapshot can not work without the original Image.
- Create a completely new Image: Save the current state of this node as a completely new device. Can operate independently regardless of the original Image. However, it will take more hard drive. (Qemu only)
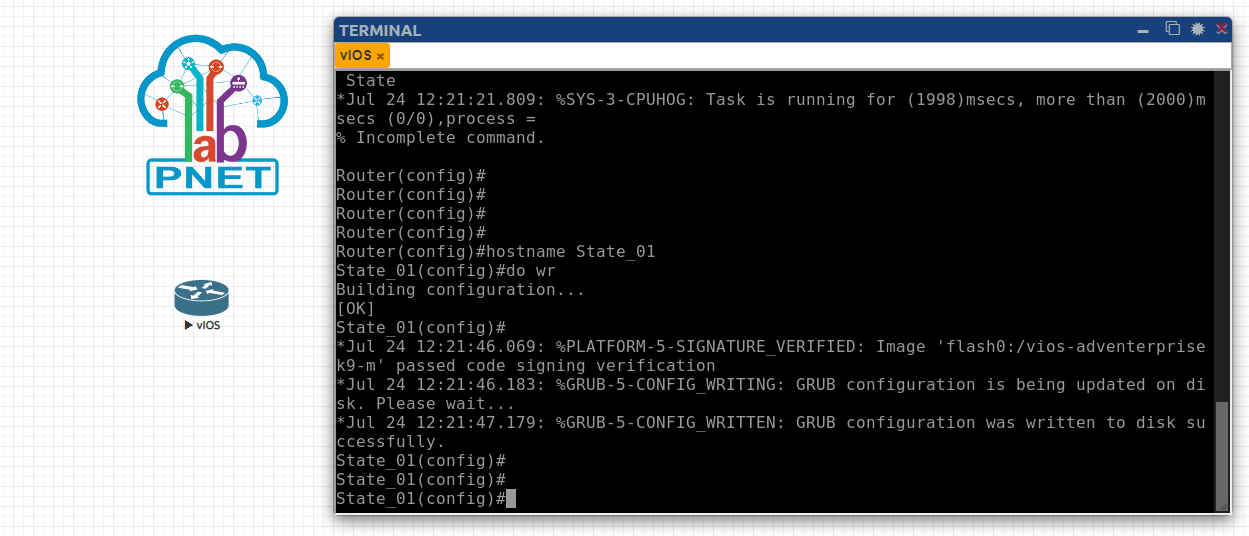
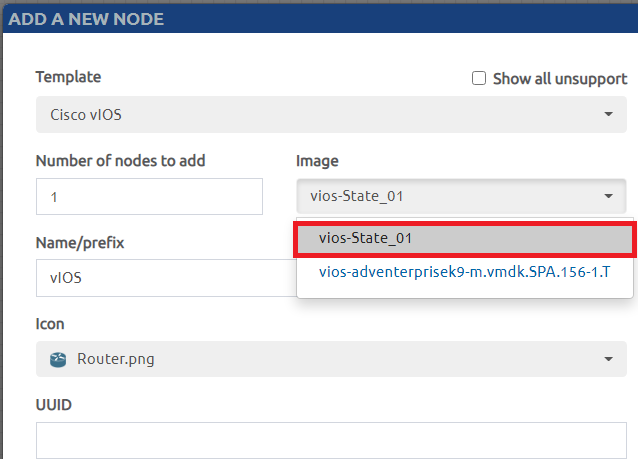
- For example: Config a Qemu vIOS with hostname is State_01 and Save Configuration to NVRam
- You can see the node Folder of Node.
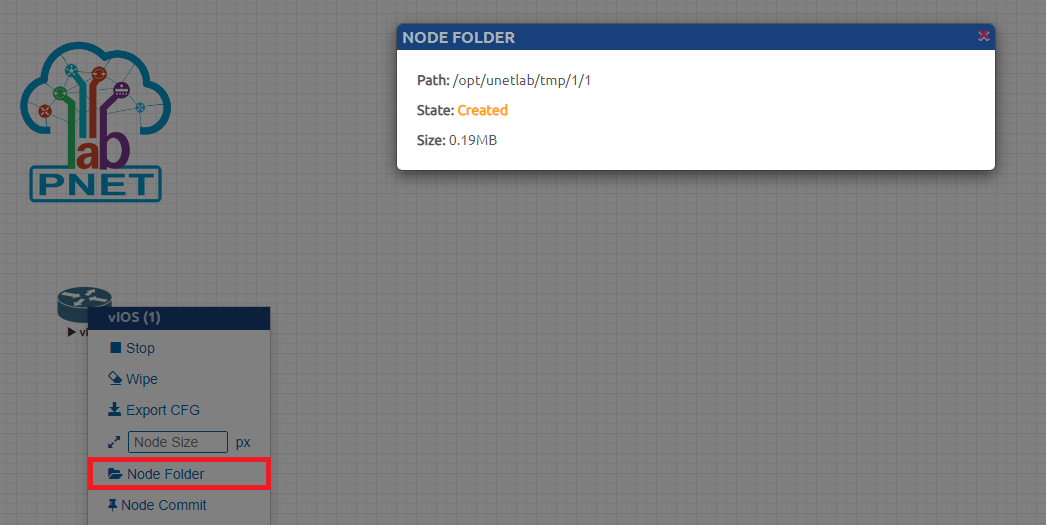
- You can Commit the current state of device by Right Click > Node Commit
- If you choose commit to original Image, all vIOS devices you create later will have hostname is State_01.
- If you choose Take Snapshot from original Image, System will auto save the current state as a new device and you can use this device same as other. You have to define the name for new Snapshot.
Click on the Commit button, system will estimate how many hard disk the new Snapshot will take.
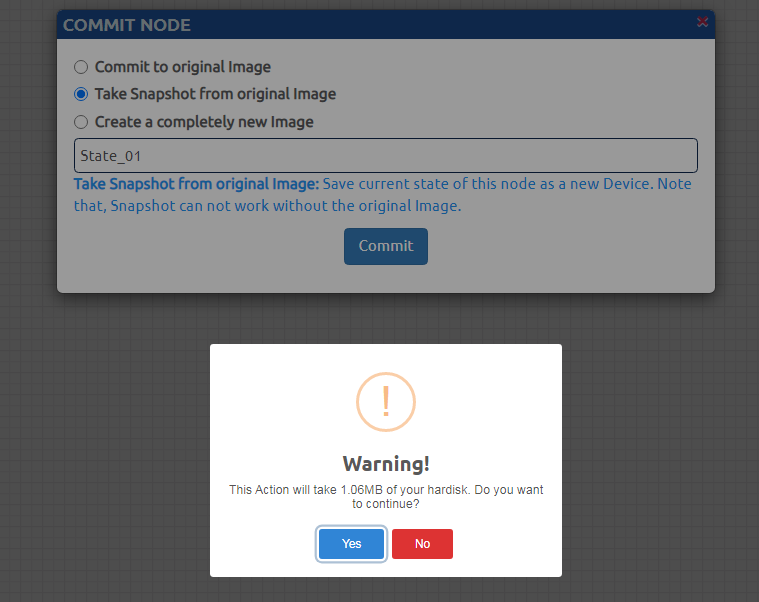
As the picture, The new Snapshot only take 1.06 MB hard disk. By this way you can create many instance of a image but still save your hard disk.
Click Yes and when finish you can see a new device with the name is the name you set.
Note:
- This feature is very helpful for some device not support save configuration e.g Juniper. You can create snapshot instead.
- The new image will can not working if you remove or edit the original image.
- With Window Node the Snapshot size will not small
- if you select Create a completely new Image, a completely new image will be created
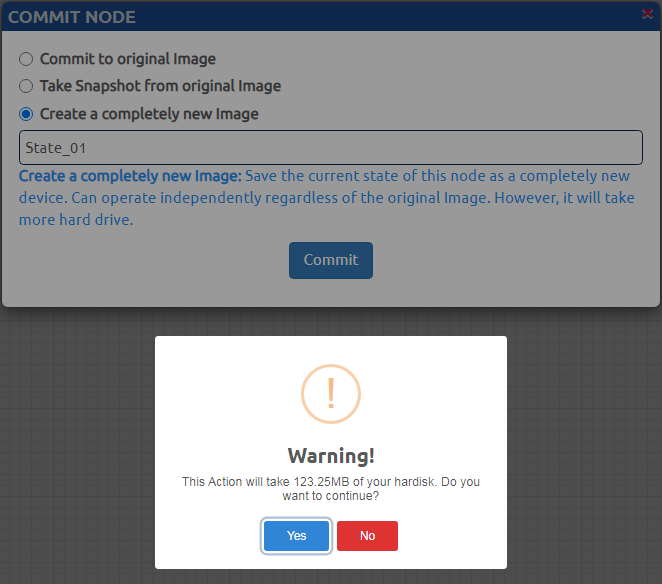
Note:
- This image can operate independently even if the original has been deleted.
- The hard disk needed to save New images will be much bigger than Snapshot